Enter what you are looking for!
Make an error or want to change something? No problem! Simply click on the "Edit my Event" tab, make your updates, and click on "Save and Publish" Your changes are processed immediately and your website is accurate in an instant.
After you login to The Driven, click on the MY PROFILE tab at the top right. Then, at the bottom of your profile page, you will see your events listed under Director Events. Click on the Manage Sub Admin link. Then, on the next screen, click on the Add Sub Admin button to enter in your sub-administrator information and their level of access to your event then click SAVE. You can add multiple sub-administrators--for example, maybe you have one person handling just the volunteers and another person managing the communications. It’s all in your hands!
Adding EVENT sub-administrators allows others to access your event according to your designations. You can grant sub-administrators full access to all aspects of your event in our Event Solutions platform by selecting all of the options (Edit My Event, Participants, Volunteer Management, Communication, My Financials), or you can allow them access to specific components you select.
After you login to The Driven, click on the EVENT SOLUTIONS tab at the top left, then select CREATE NEW EVENT. Fill in the required fields as designated by the asterisks, then click SAVE & CONTINUE. Don’t worry if you need to make changes--our platform will reflect your updates in real time.
Here is your opportunity to provide a description of your event, complete with pictures, colorful font, hyperlinks, and more. You may want to include a description of the course or set up, the purpose of the event, the event’s cause (if applicable), packet pick up, and any other information important for your registrants to know.
Great question! The EVENT is your overall occasion. If your registrants only have one option, for example the only choice is a 5K run/walk, then it’s likely your EVENT and SUB-EVENT are the same thing, and you will enter the required SUB-EVENT information, adding more details about the event as you wish. However, if your event will feature more than one option, such as a 5K and a 10K route, then you will enter in information for each SUB-EVENT. This will help you track participants, assign bib information appropriately, manage course volunteers, as well as allow you to assign different start times for different sub-events, set different entry fees, and more.
Click on the COMMUNICATIONS tab in EVENT SOLUTIONS. Here you can upload a document or draft an email that can be sent to all of your EVENT PARTICIPANTS or SELECT GROUPS such as VOLUNTEERS or registrants for just one of your SUB-EVENTS. The emails will be sent to the emails the registrants used to sign up for your event. You will have the opportunity to send a test email to make sure the COMMUNICATION is how you want it. Do note that the email recipients have the right to unsubscribe from future email communications.
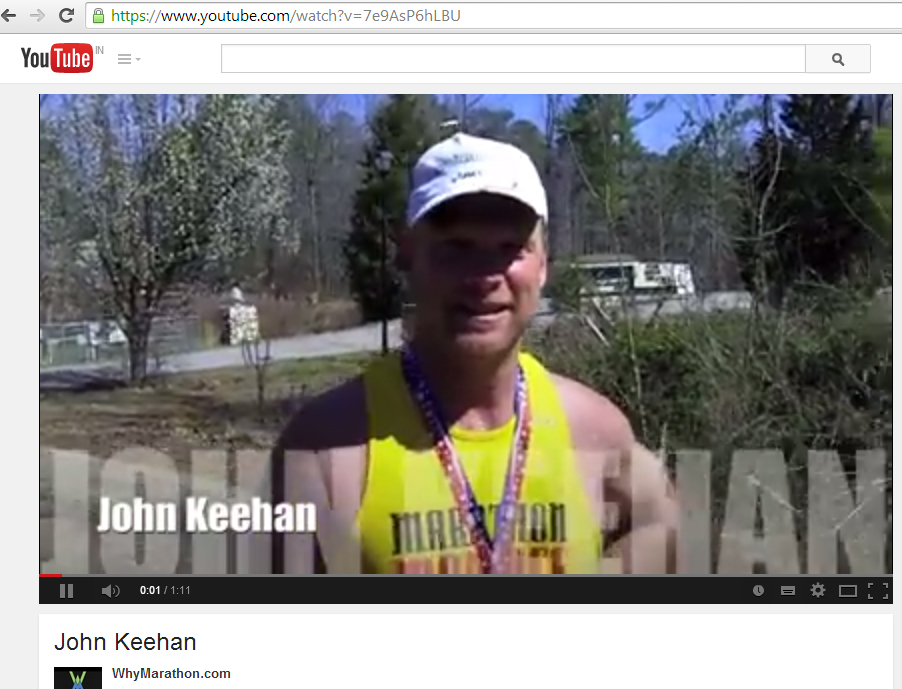
Upload your video to YouTube and then open it.
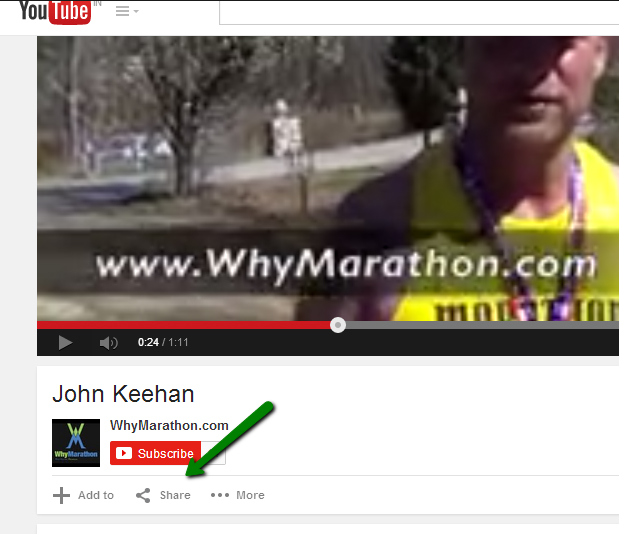
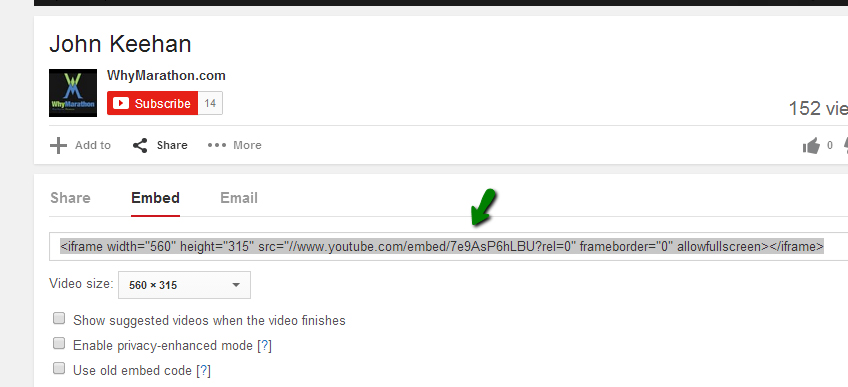
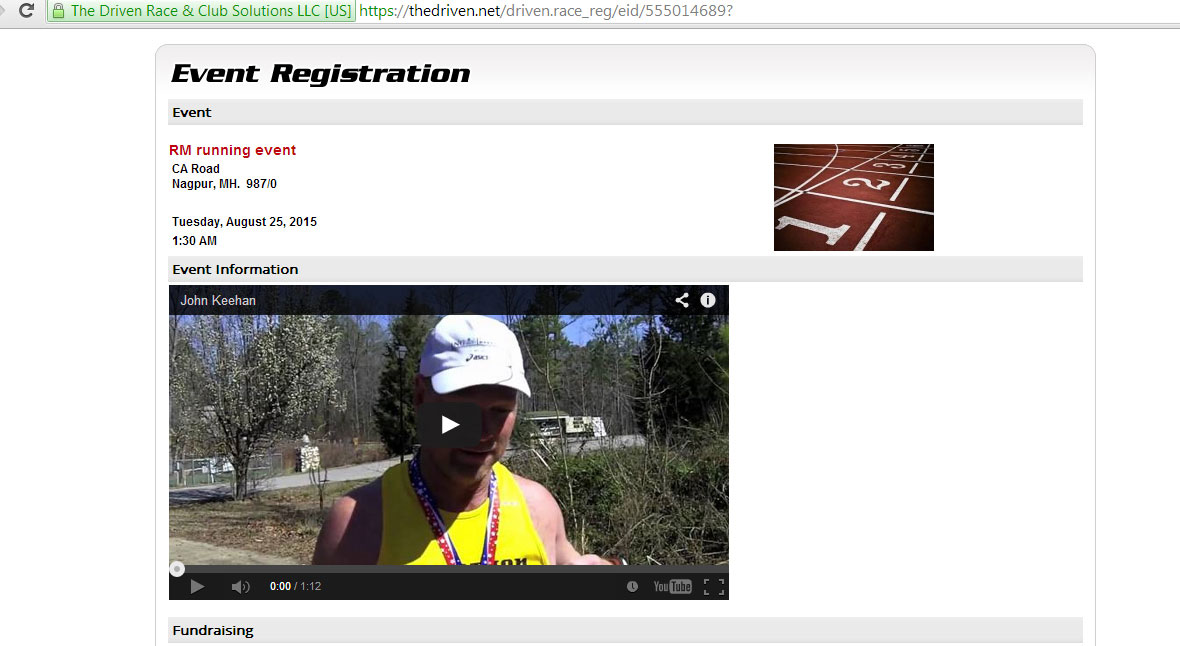
Then Hit share Click on Embed and Uncheck all 3 checkboxes and copy the embed code. Paste the code in the Event information editor where you want to place the video. Now save the changes and check the event page. If you do not see the video in the event page, go back to the event setup and hit save. Again if you want to adjust the height and width of the video screen you can change that in the code you copied
Login to thedriven.net
Select the event from the dropdown and click on the Participant menu option. View Screenshot
Click on activate dynamic registration. A form will appear to create an account. You need to sign up here with the required information.
View Screenshot
A) You need to add a username and password so that your volunteers will have access to dynamic registration section.
View Screenshot
B) You can set privileges for volunteer access. They can be allowed to change participant information, change Give-away selection and switch registration options.
C) Once you've signed up and activated Dynamic Registration successfully. This is the link that gets you access to the dynamic registration section. This will show up every time you come to this page. View Screenshot
So make a note of this link once you've signed up.
You can allow participants of your event to submit their result, resend links to submit results, arrange the submitted results with result categories.
Please find the details below,
A) Edit the event where you want to enable the post results option or if you are creating a new event then click on Create a new event button.
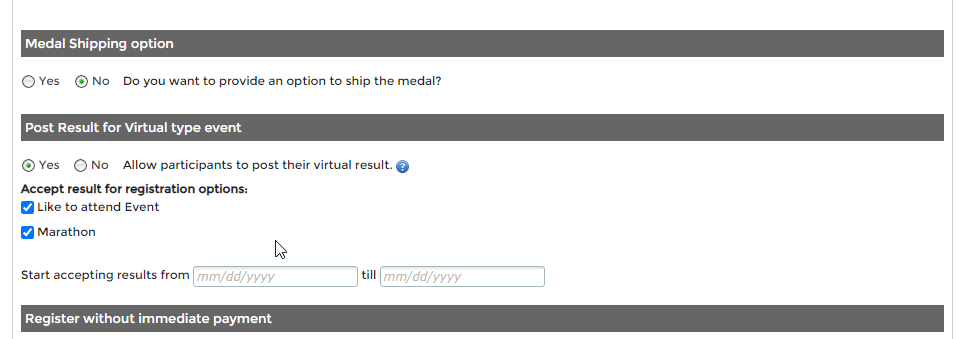
B) On Step 3) Pricing/Questions scroll down to enable the Post Results option.
C) Select the registration options for which you want to enable the Post Result option. View Screenshot
D) Set up the time frame to accept the results from participants if you want to keep the option time bound. View Screenshot
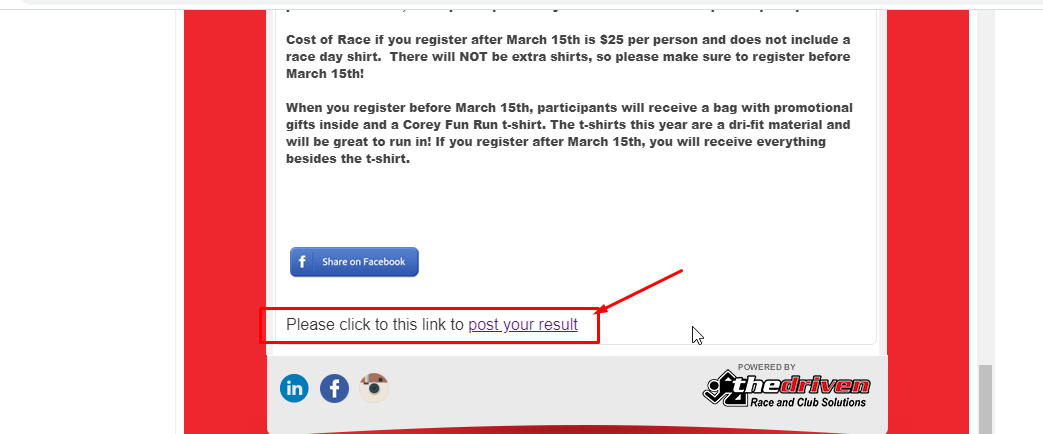
E) Links to post the result for the event will be included in the participants registration confirmation email. View Screenshot
You can set up result categorie(s) for the event on the "Results" link under the "Participant/Results" tab. View Screenshot
Add the Categories, check the boxes against the category to be displayed and click on Save Result Category.
Result Categories can be set up based on registration option, gender and age. View Screenshot
Option is provided under Participant/Results tab here. View Screenshot
Participant Result Submission:
Participants will be able to submit their result by entering their time. View Screenshot
If you have set up result categories for the event, participants will start showing results in applicable categories.
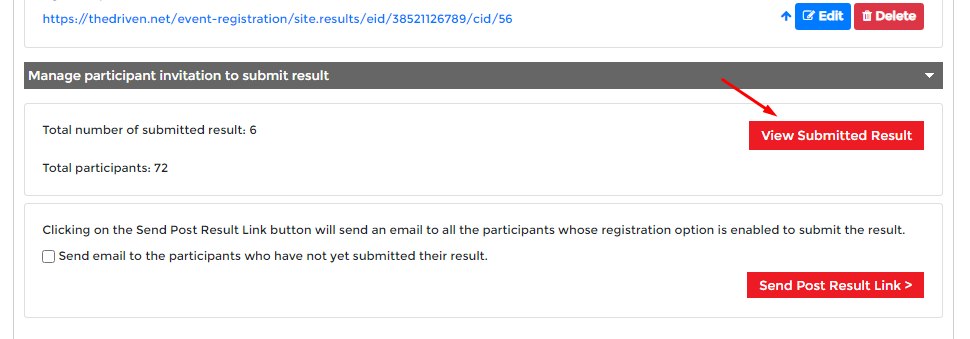
Results submitted by participants can be accessed from here. View Screenshot
A) Edit the event you want to enable the Medal Shipping option for or if you are creating a new event then click on Create a new event button.
B) On Step 3) Pricing/Questions scroll down to enable the Medal Shipping option.
C) You have the option to set up a charge or ship the medal at no additional cost.
Other options such as donate medal to charity, don't need a medal and other can be setup. The participant will be able to choose any one option.
D) Select the registration options for which you want to enable the medal shipping option. View Screenshot
A) Edit the event you want to enable the Pre-registration option for or if you are creating a new event then click on Create a new event button.
B) On Step 3) Pricing/Questions scroll down to enable the Pre-Registrations option.
C) You have an option to edit the Registration Description View Screenshot,
Message for Event Attendees View Screenshot,
Confirmation Page Description View Screenshot and
set the pre-registration confirmation email. View Screenshot
Once you created your dynamic registration account for your specific event. Click on the link in dynamic registration setup. View Screenshot
You need to login with details(Username and password) you added while creating the account. View Screenshot
There will be two options on the page- Participants check-in and Manually add participants.
1) Participant Check in This page allows you to search participant by their first name, last name and showing search result below. View Screenshot
On left side of each record you will find text box for bib assign, you can assign bib number to multiple participants at once.
You can assign bib numbers from here and can edit existing participant info.
Likewise, they can switch the race, edit details, change the t-shirt size as well.
For switching race and for changing t-shirt, there is an option in right side of the form, check the screenshot below.
View Screenshot
2) Add Participant onsite,
Click on Manually Add Participants: View Screenshot
Enter all the details required in form by participants, remember onsite we take only cash or check, Once done click on the Add Participant button, Your registration is done.
Make an error or want to change something? No problem! Simply click on the "Edit my Event" tab, make your updates, and click on "Save and Publish" Your changes are processed immediately and your website is accurate in an instant.
After you login to The Driven, click on the MY PROFILE tab at the top right. Then, at the bottom of your profile page, you will see your events listed under Director Events. Click on the Manage Sub Admin link. Then, on the next screen, click on the Add Sub Admin button to enter in your sub-administrator information and their level of access to your event then click SAVE. You can add multiple sub-administrators--for example, maybe you have one person handling just the volunteers and another person managing the communications. It’s all in your hands!
Adding EVENT sub-administrators allows others to access your event according to your designations. You can grant sub-administrators full access to all aspects of your event in our Event Solutions platform by selecting all of the options (Edit My Event, Participants, Volunteer Management, Communication, My Financials), or you can allow them access to specific components you select.
After you login to The Driven, click on the EVENT SOLUTIONS tab at the top left, then select CREATE NEW EVENT. Fill in the required fields as designated by the asterisks, then click SAVE & CONTINUE. Don’t worry if you need to make changes--our platform will reflect your updates in real time.
Here is your opportunity to provide a description of your event, complete with pictures, colorful font, hyperlinks, and more. You may want to include a description of the course or set up, the purpose of the event, the event’s cause (if applicable), packet pick up, and any other information important for your registrants to know.
Great question! The EVENT is your overall occasion. If your registrants only have one option, for example the only choice is a 5K run/walk, then it’s likely your EVENT and SUB-EVENT are the same thing, and you will enter the required SUB-EVENT information, adding more details about the event as you wish. However, if your event will feature more than one option, such as a 5K and a 10K route, then you will enter in information for each SUB-EVENT. This will help you track participants, assign bib information appropriately, manage course volunteers, as well as allow you to assign different start times for different sub-events, set different entry fees, and more.
Click on the COMMUNICATIONS tab in EVENT SOLUTIONS. Here you can upload a document or draft an email that can be sent to all of your EVENT PARTICIPANTS or SELECT GROUPS such as VOLUNTEERS or registrants for just one of your SUB-EVENTS. The emails will be sent to the emails the registrants used to sign up for your event. You will have the opportunity to send a test email to make sure the COMMUNICATION is how you want it. Do note that the email recipients have the right to unsubscribe from future email communications.
Upload your video to YouTube and then open it.
Then Hit share Click on Embed and Uncheck all 3 checkboxes and copy the embed code. Paste the code in the Event information editor where you want to place the video. Now save the changes and check the event page. If you do not see the video in the event page, go back to the event setup and hit save. Again if you want to adjust the height and width of the video screen you can change that in the code you copied
Login to thedriven.net
Select the event from the dropdown and click on the Participant menu option. View Screenshot
Click on activate dynamic registration. A form will appear to create an account. You need to sign up here with the required information.
View Screenshot
A) You need to add a username and password so that your volunteers will have access to dynamic registration section.
View Screenshot
B) You can set privileges for volunteer access. They can be allowed to change participant information, change Give-away selection and switch registration options.
C) Once you've signed up and activated Dynamic Registration successfully. This is the link that gets you access to the dynamic registration section. This will show up every time you come to this page. View Screenshot
So make a note of this link once you've signed up.
Once you created your dynamic registration account for your specific event. Click on the link in dynamic registration setup. View Screenshot
You need to login with details(Username and password) you added while creating the account. View Screenshot
There will be two options on the page- Participants check-in and Manually add participants.
1) Participant Check in This page allows you to search participant by their first name, last name and showing search result below. View Screenshot
On left side of each record you will find text box for bib assign, you can assign bib number to multiple participants at once.
You can assign bib numbers from here and can edit existing participant info.
Likewise, they can switch the race, edit details, change the t-shirt size as well.
For switching race and for changing t-shirt, there is an option in right side of the form, check the screenshot below.
View Screenshot
2) Add Participant onsite,
Click on Manually Add Participants: View Screenshot
Enter all the details required in form by participants, remember onsite we take only cash or check, Once done click on the Add Participant button, Your registration is done.
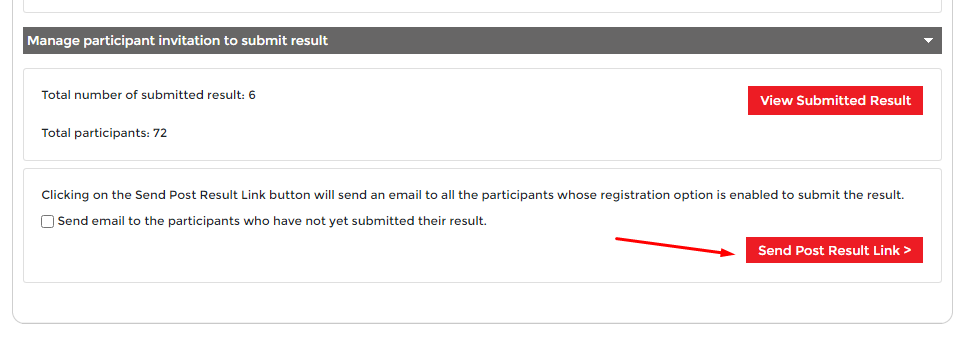
You can allow participants of your event to submit their result, resend links to submit results, arrange the submitted results with result categories.
Please find the details below,
A) Edit the event where you want to enable the post results option or if you are creating a new event then click on Create a new event button.
B) On Step 3) Pricing/Questions scroll down to enable the Post Results option.
C) Select the registration options for which you want to enable the Post Result option. View Screenshot
D) Set up the time frame to accept the results from participants if you want to keep the option time bound. View Screenshot
E) Links to post the result for the event will be included in the participants registration confirmation email. View Screenshot
You can set up result categorie(s) for the event on the "Results" link under the "Participant/Results" tab. View Screenshot
Add the Categories, check the boxes against the category to be displayed and click on Save Result Category.
Result Categories can be set up based on registration option, gender and age. View Screenshot
Option is provided under Participant/Results tab here. View Screenshot
Participant Result Submission:
Participants will be able to submit their result by entering their time. View Screenshot
If you have set up result categories for the event, participants will start showing results in applicable categories.
Results submitted by participants can be accessed from here. View Screenshot
A) Edit the event you want to enable the Medal Shipping option for or if you are creating a new event then click on Create a new event button.
B) On Step 3) Pricing/Questions scroll down to enable the Medal Shipping option.
C) You have the option to set up a charge or ship the medal at no additional cost.
Other options such as donate medal to charity, don't need a medal and other can be setup. The participant will be able to choose any one option.
D) Select the registration options for which you want to enable the medal shipping option. View Screenshot
A) Edit the event you want to enable the Pre-registration option for or if you are creating a new event then click on Create a new event button.
B) On Step 3) Pricing/Questions scroll down to enable the Pre-Registrations option.
C) You have an option to edit the Registration Description View Screenshot,
Message for Event Attendees View Screenshot,
Confirmation Page Description View Screenshot and
set the pre-registration confirmation email. View Screenshot

